Node.js
Introduction
Node.js is a server platform that runs applications written in JavaScript.
First, you need to install Node.js:
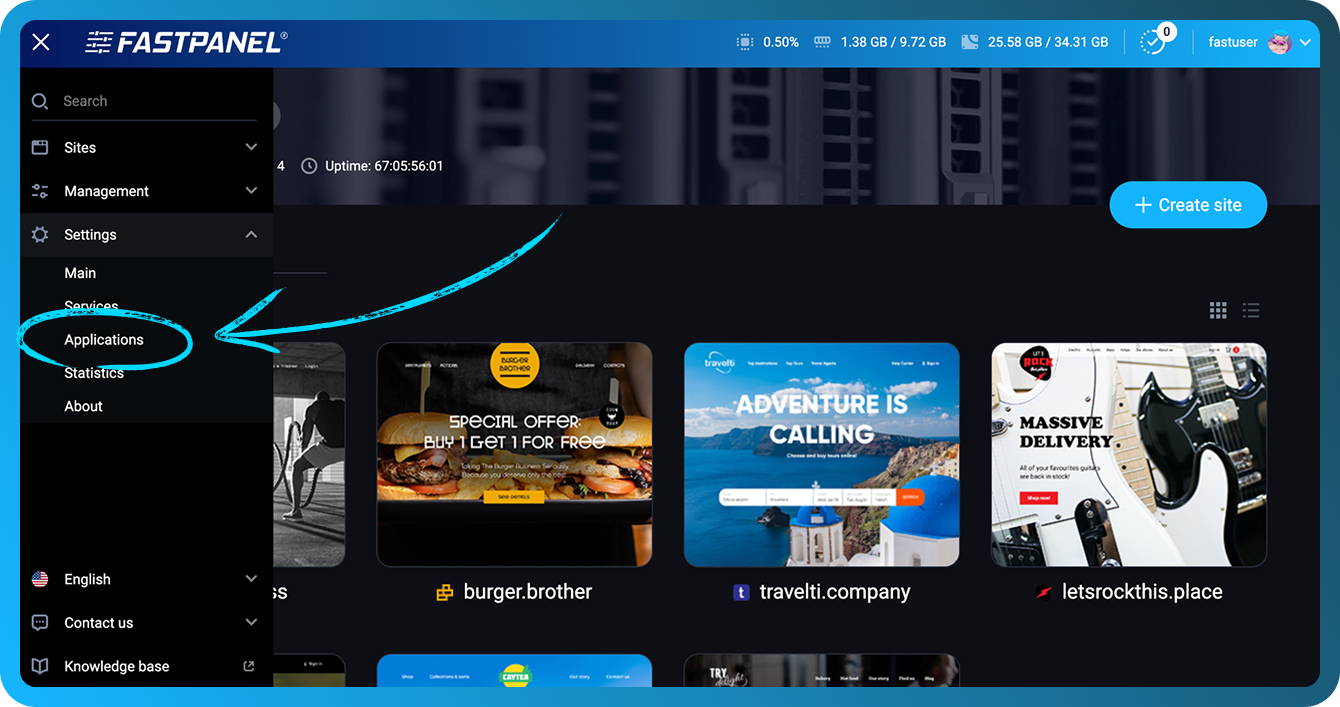
- Go to "Settings" -> "Applications"
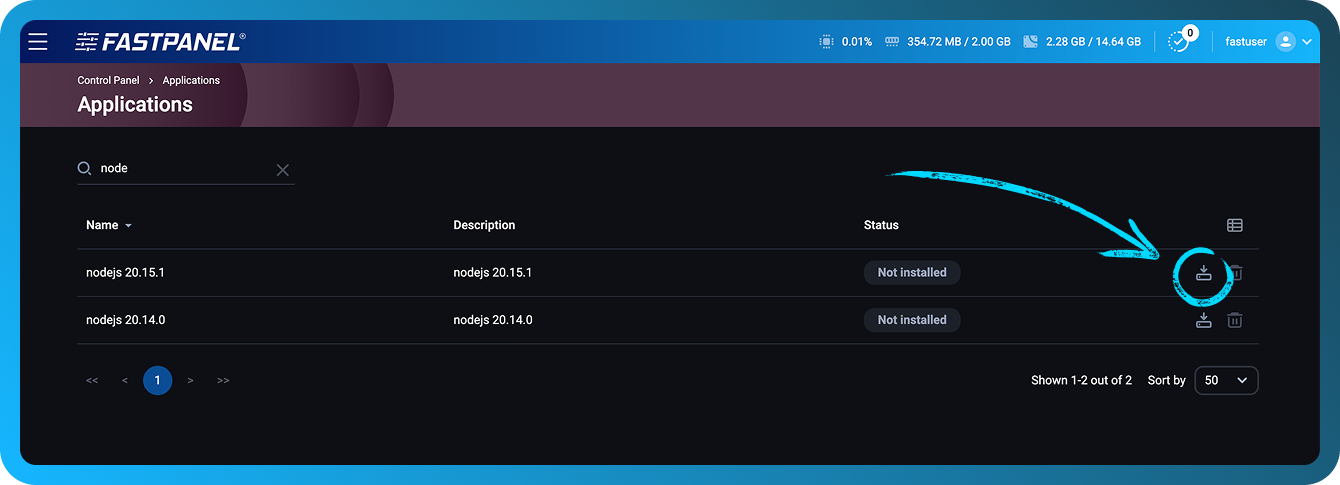
- Click the "Install" button for the required Node.js version
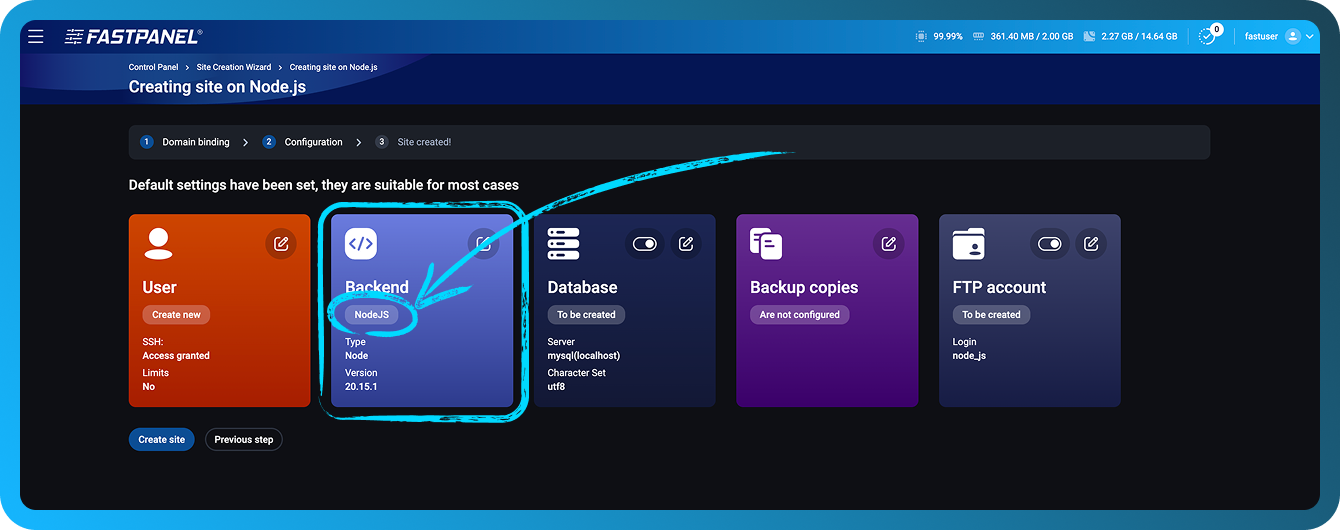
Create a website:
- Select a template for a Node.js website

- Specify the domain and related parameters. At the configuration stage you can change the DB, FTP user, and Backend
- Upload the application files into the website directory
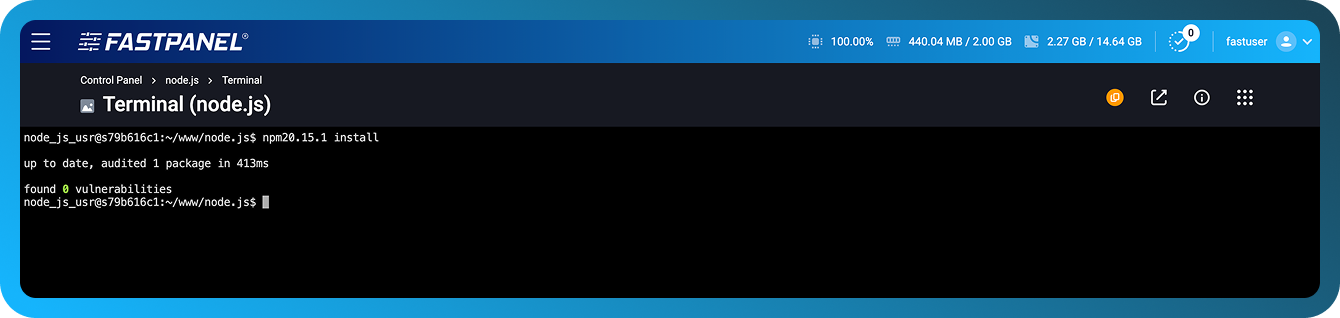
- To install dependencies run
npm20.15.1 installin Terminal (need to install ttyd application for FASTPANEL®)
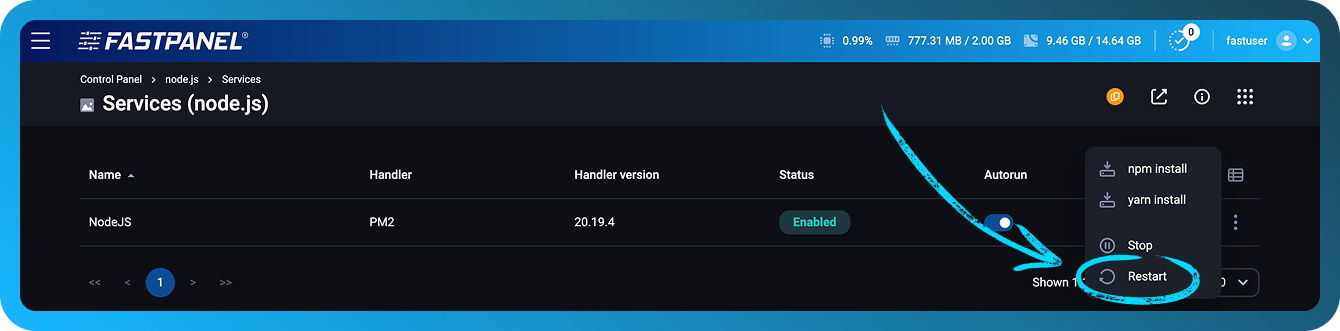
- Restart Node.js by going to the site dashboard and then opening the "Services" section.
Express framework
Using the Express framework as an example, let’s create a simple web server:
- Connect to the server via SSH as the user who owns the site (you can use the ttyd application for FASTPANEL®)
- Create a file
app.jsin the website directory and fill it with the following code:
const express = require('express');
const app = express();
const PORT = process.env.SERVICE_PORT;

app.get('/', (req, res) => {
  res.send('Hello! This is my first server on Node.js + Express 🚀');
});

app.listen(PORT, () => {
  console.log(`Server is running at http://localhost:${PORT}`);
});
- In the website directory, run the command to install express
npm20.15.1 install express
- Go to the site dashboard, then to the Services section
- Restart the service
- Check the website
Docusaurus
Using the Docusaurus web application as an example, let’s configure settings:
- Connect to the server via SSH as the user who owns the site (you can use the ttyd application for FASTPANEL®)
- In the website directory, run the Docusaurus installation
npx20.15.1 create-docusaurus -j ./docs
- When asked to select a template, answer classic (recommended)
- After installation, replace one line in the file
docs/package.json
"start": "docusaurus start",
# replace with
"start": "docusaurus start --port $SERVICE_PORT",
$SERVICE_PORT is a system variable set in FASTPANEL®
- In the control panel, go to "site settings" -> "Backend"
- Select the Standalone or PM2 handler.
- Choose the desired Node.js version.
- Specify the working folder
docs - In the Launch command field, enter:
npm run start - Save. Wait for the application to compile (information will appear in the logs). Check the website
Next.js
Using Next.js with Node.js 20.19 as an example, let’s create a simple web server:
- Connect to the server via SSH as the user who owns the website (you can also use the ttyd application in FASTPANEL®).
- In the website directory, run the project initialization command:
yarn20.19.4 init -y
yarn20.19.4 add next react react-dom
- Add a scripts block to the
package.jsonfile:
"scripts": {
  "dev": "next dev -p $SERVICE_PORT",
  "build": "next build",
  "start": "next start -p $SERVICE_PORT"
}
- Create a
pagesdirectory and inside it, add a file namedindex.js:
mkdir pages
cat <<EOF > pages/index.js
export async function getServerSideProps() {
  return {
    props: {
      nodeVersion: process.version,
      port: process.env.SERVICE_PORT || 3000,
    },
  };
}

export default function Home({ nodeVersion, port }) {
  return (
    <div style={{
      fontFamily: 'sans-serif',
      textAlign: 'center',
      marginTop: '20vh'
    }}>
      <h1>✅ It works!</h1>
      <p>Next.js app running on Node.js {nodeVersion}</p>
      <p>Port: {port}</p>
    </div>
  );
}
EOF
- Run the project build.
yarn20.19.4 build
- In the control panel, go to "site settings" -> "Backend"
- Select the Standalone or PM2 handler.
- Choose the desired Node.js version.
- In the Launch command field, enter:
yarn run start. - Save. Wait for the application to compile (information will appear in the logs). Check the website
Additional information
In Standalone mode, a Node.js process is launched to execute your scripts.
In PM2 mode, the PM2 process manager is used to manage Node.js processes, logs, and system load.
This mode also allows you to specify the number of workers — that is, the number of Node.js processes handling incoming requests to the server.
Additionally, this mode provides the Enable file watch option — PM2 automatically restart your application when a file is modified in the current directory or its subdirectories. Please note that this mode introduces additional system load and is not recommended for production environments.
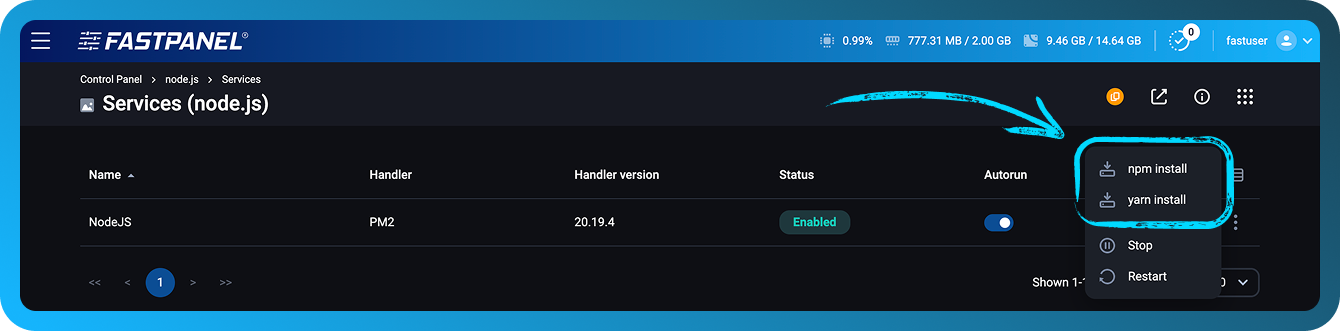
Similarly, you can configure the application if it requires YARN instead of NPM
You can install your project’s dependencies listed in package.json using YARN or NPM directly from FASTPANEL®. To do this, open the website card and go to the Services section:
Logs
A Node.js application can generate logs. In FASTPANEL®, they are located in the site dashboard, in the Logs section, under the "Backend log" tab
Console commands
After installing Node.js in FASTPANEL®, users can work with their projects using console commands such as:
- pm2
- yarn20.15.1
- npx20.15.1
- npm20.15.1
- node20.15.1
Example:
$ npm20.15.1 list
node-socket-port-server@1.0.0 /var/www/node_user/data/www/node.site
└── express@4.21.2
$ pm2 ls
┌────┬─────────────┬─────────────┬─────────┬─────────┬──────────┬────────┬──────┬───────────┬──────────┬──────────┬──────────┬──────────┐
│ id │ name        │ namespace   │ version │ mode    │ pid      │ uptime │ ↺    │ status    │ cpu      │ mem      │ user     │ watching │
├────┼─────────────┼─────────────┼─────────┼─────────┼──────────┼────────┼──────┼───────────┼──────────┼──────────┼──────────┼──────────┤
│ 0  │ amazing_site│ default     │ 1.0.0   │ cluster │ 9355     │ 2m     │ 0    │ online    │ 0%       │ 62.4mb   │ user     │ disabled │
│ 1  │ amazing_site│ default     │ 1.0.0   │ cluster │ 9362     │ 2m     │ 0    │ online    │ 0%       │ 62.5mb   │ user     │ disabled │
└────┴─────────────┴─────────────┴─────────┴─────────┴──────────┴────────┴──────┴───────────┴──────────┴──────────┴──────────┴──────────┘
Each command name includes the version number of Node.js that was installed. In this example, the available version is Node.js 20.15.1.